Cobectb tbo9i (talk | contribs) (Just for you.) |
|||
| (22 intermediate revisions by 14 users not shown) | |||
| Line 13: | Line 13: | ||
}} |
}} |
||
| − | '''The Forgotten''' is a secret [[character]] added in [[ |
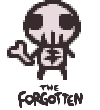
+ | '''The Forgotten''' is a secret [[character]] added in [[Booster Pack #5]] that resembles a [[Bony]]. He cannot fire regular tears, and instead has a bone club that can be swung as a melee weapon or charged to be thrown. |
| − | The Forgotten cannot acquire regular heart containers. Any regular heart containers acquired will be turned into bone hearts, and any soul or black hearts will be given to The Soul. The Forgotten and The Soul share a health bar, so each form |
+ | The Forgotten cannot acquire regular heart containers. Any regular heart containers acquired will be turned into bone hearts, and any soul or black hearts will be given to The Soul. The Forgotten and The Soul share a health bar, so each form has a maximum of 6 hearts instead of the regular 12. |
== The Soul == |
== The Soul == |
||
| − | Pressing the swap key (CTRL on PC |
+ | Pressing the swap key (CTRL on PC / R2 on PS4 / RT on Xbox / ZR on Switch) will switch control to '''The Soul''', a blue ghost chained to the Forgotten who fires spectral tears and flies. |
| + | |||
| + | While controlling The Soul, The Forgotten cannot take damage, blocks all normal shots that touch it, and attracts shots in a small <1 tile radius. If the Soul dies, the run will end. |
||
== Notes == |
== Notes == |
||
| − | * The Forgotten's bone club deals |
+ | * The Forgotten's bone club deals 3× his damage when swung and 1.5× his damage when thrown. |
| − | * The Forgotten's |
+ | * The Forgotten's bone club passes through walls, obstacles, and enemies. |
| − | * The Forgotten cannot take [[ |
+ | * The Forgotten cannot take [[deal with the Devil|deals with the Devil]] as he only has bone hearts, but The Soul can with its soul hearts. If a deal would kill The Soul, quickly switching to The Forgotten will keep him alive. |
| − | ** If The Soul has no |
+ | ** If The Soul has no Hearts, switching to the Soul is disabled until another Soul or Black Heart is acquired. |
| − | ** Losing red hearts inside |
+ | ** Losing red hearts inside bone heart containers does not count as red heart damage for devil deal chances, but breaking bone heart containers does. |
| + | * The Forgotten's melee attack can collect pickups and open chests. |
||
| − | * While the Soul is active, the body will block enemy shots and actively pull nearby enemy shots into itself. The attraction range is less than one tile width. |
||
| − | * |
+ | ** Opening a [[Mimic Chest]] this way deals no damage. |
| − | ** [[ |
+ | ** [[Bomb Chest]]s cannot be opened this way. [[Locked Chest]]s and [[Eternal Chest]]s still require a key or the {{t|Paper Clip}} to open. |
| − | ** Items that can be moved but |
+ | ** Items that can be moved but cannot be picked up are pushed. This can launch [[bomb]]s {{i|Dr. Fetus}}-style or knock [[Troll Bomb]]s away. |
| − | * {{t|Crow Heart |
+ | * {{t|Crow Heart}} prevents The Forgotten from losing bone heart containers as long as it still has red health. |
| − | * The [[shot speed]] and [[tear height]] stats have no |
+ | * The [[shot speed]] and [[tear height]] stats have no effect on the Forgotten's melee attack or bone toss. |
* The [[range]] stat increases how far away from the Forgotten the melee attack's arcs appear. It doesn't affect the bone toss. |
* The [[range]] stat increases how far away from the Forgotten the melee attack's arcs appear. It doesn't affect the bone toss. |
||
| − | * Items that increase character size increase the range of the melee attack. Items that decrease character size have no |
+ | * Items that increase character size increase the range of the melee attack. Items that decrease character size have no effect on the range of the melee attack. |
| − | * To switch between two pills/cards, press the swap key |
+ | * To switch between two pills/cards, press the swap key twice quickly. |
| + | * Picking up health upgrades as The Soul will convert them into soul hearts, just like [[???]]. It's generally advisable to pick up health as The Forgotten, since bone hearts are much rarer. |
||
| − | * |
+ | * Unidentified pills are more safely consumed in Soul form, as a [[Hematemesis]] pill can be very detrimental for the Forgotten but has no negative effect when consumed as the Soul. |
** [[Health Down]] pills are converted to [[Health Up]] for both forms, but the empty bone heart gained may be risky for retaining Devil Room chances. |
** [[Health Down]] pills are converted to [[Health Up]] for both forms, but the empty bone heart gained may be risky for retaining Devil Room chances. |
||
== Unlocking the Forgotten == |
== Unlocking the Forgotten == |
||
| − | + | [[The Lamb]] must have been defeated previously before The Forgotten can be unlocked, and unlocking The Forgotten can be done in both Normal and Hard difficulty. Having [[The Negative]] unlocked is recommended. |
|
| + | |||
| − | + | # First, start a new unseeded run as any character. Defeat the first floor's boss within 1 minute. If done correctly, Mom will yell and the sound of running footsteps will play, then a large shadow of a shovel handle will loom over the floor of the starting room. Bombing anywhere in the starting room will spawn the {{i|Broken Shovel 1}}. Initially the shovel piece behaves like a pickup, laying on the floor, and turns into an active collectible only when touched for the first time. |
|
| − | + | #* Holding the Broken Shovel will cause Mom to continually try to stomp Isaac. Using the Broken Shovel will stop the stomping for the current room, or the current wave of a multi-wave room such as the Boss Rush. |
|
| − | ** The |
+ | #** The stomps won't happen in the [[Mom]] fight. |
| − | ** |
+ | #** Stomps count as explosions, so{{i|Pyromaniac}} or{{i|Host Hat}} provide immunity to them. |
| − | ** |
+ | #**Stomps break rocks and damage enemies. If the player has [[Gnawed Leaf]] and a lot of patience, the stomps will eventually clear rooms. |
| − | + | #* On XL floors, only the last boss must be defeated. [[The Emperor]] Card allows the first boss to be skipped. |
|
| − | + | #* Once the Broken Shovel is picked up, it '''''must not''''' be replaced by another active item. If it is on an item pedestal when Isaac leaves the room, it will disappear. |
|
| − | ** This cannot be done during a seeded run; it must be random. Mom's Voice will not trigger and you will not be able to bomb for the shovel. |
||
| − | + | # Next, clear [[Boss Rush]]. This will grant the second piece of the {{i|Broken Shovel 2}}, completing {{i|Mom's Shovel}}. |
|
| − | * The Broken Shovel |
+ | #* The Broken Shovel '''''must''''' be held when the boss rush is beaten. Otherwise, only a normal boss rush completion item will drop. |
| − | + | #* After defeating [[Mom]], if it is unlocked only{{i|The Negative}} will spawn, otherwise a standard boss item will spawn. |
|
| + | #* If {{i|The Negative}} is not unlocked you must use a [[Sacrifice Room]] to proceed to {{s|Dark Room}}, '''''you are not guaranteed to be able to do this on every run.''''' |
||
| − | + | #* The normal 20-minute time limit to reach Boss Rush does not apply. The hole to {{s|The Womb}} after [[Mom]] will be sealed until the Boss Rush is completed. |
|
| − | + | #* After Mom's Shovel is acquired, Mom's feet will stop attempting to stomp Isaac. |
|
| − | + | # Finally, a single [[Grave Room]] with a [[dirt patch]] in its center will appear in the {{s|Dark Room}}. Using Mom's Shovel while standing on the dirt patch unlocks The Forgotten. |
|
| − | ** Wait for the soul to reach the top, otherwise the Forgotten won't be unlocked. |
||
| + | #* If the Grave Room is exited before the soul reaches the top of the screen, the Forgotten may not unlock. |
||
| − | * |
+ | #* Holding Mom's Shovel prevents the beam of light to the Cathedral from appearing, forcing Isaac into the trapdoor to {{s|Sheol}}. |
| − | * If stuck, confused, or frustrated, check the |
+ | #* If stuck, confused, or frustrated, check the{{i|Broken Shovel 1|n}} page for tips and help. |
== Item Interactions == |
== Item Interactions == |
||
| − | Many items have unique interactions with The Forgotten's |
+ | Many items have unique interactions with The Forgotten's bone club or the Soul and the Forgotten's unique health system. The Soul's tears are affected normally. |
* {{i|Abaddon}}: Grants 6 black hearts to The Soul and empties The Forgotten's bone hearts, but doesn't remove them. |
* {{i|Abaddon}}: Grants 6 black hearts to The Soul and empties The Forgotten's bone hearts, but doesn't remove them. |
||
| − | * {{i|Adrenaline |
+ | * {{i|Adrenaline}}: Empty bone hearts increase damage, but the damage buff is removed if the bone heart breaks. |
| − | * {{i|Angelic Prism |
+ | * {{i|Angelic Prism}}: When the bone club hits the prism, the prism fires 4 bone clubs while the original bone club travels back to The Forgotten. The bone club will quadruple when passing through prism whether traveling away from or back towards The Forgotten. However, bone clubs fired from the prism will travel and spread out very quickly, making it hard to hit enemies with them unless they are close to the prism. |
* {{i|Anti-Gravity}}: The bone's melee attack will linger in place briefly and can damage enemies, or even pick up items that move into the arc. Will not damage enemies more than once per swing. The throw is unaffected. |
* {{i|Anti-Gravity}}: The bone's melee attack will linger in place briefly and can damage enemies, or even pick up items that move into the arc. Will not damage enemies more than once per swing. The throw is unaffected. |
||
** Anti-Gravity + Mom's Knife: As Mom's Knife allows hitting enemies more than once in a single swing, with Anti-Gravity it will hit enemies up to 4 times. The throw is unaffected. |
** Anti-Gravity + Mom's Knife: As Mom's Knife allows hitting enemies more than once in a single swing, with Anti-Gravity it will hit enemies up to 4 times. The throw is unaffected. |
||
| Line 68: | Line 72: | ||
* {{i|Brimstone}}: The charged attack will spawn a Brimstone ball which will float in front of The Forgotten for a few seconds before disappearing. The Forgotten will still melee attack while performing this action. |
* {{i|Brimstone}}: The charged attack will spawn a Brimstone ball which will float in front of The Forgotten for a few seconds before disappearing. The Forgotten will still melee attack while performing this action. |
||
* {{i|Chocolate Milk}}: The bone grows in size and damage as it is charged, but it cannot be thrown. Unlike regular tears, the bone swing cannot be spammed by rapidly tapping the attack button. |
* {{i|Chocolate Milk}}: The bone grows in size and damage as it is charged, but it cannot be thrown. Unlike regular tears, the bone swing cannot be spammed by rapidly tapping the attack button. |
||
| − | * {{i|Compound Fracture |
+ | * {{i|Compound Fracture}}/{{i|Cricket's Body}}: Smaller bone shots appear whenever an enemy is hit with the melee attack. The throw is unaffected. |
* {{i|Converter}}: Takes two soul or black hearts and gives a bone heart if used in Soul form. If the Soul runs out of hearts this way, it will not cause death but instead just automatically swap back to the Forgotten. |
* {{i|Converter}}: Takes two soul or black hearts and gives a bone heart if used in Soul form. If the Soul runs out of hearts this way, it will not cause death but instead just automatically swap back to the Forgotten. |
||
* {{i|Cursed Eye}}: The Forgotten's bone toss attack is replaced with multiple rapid melee attacks, the number depending on how long the attack buttons are held. |
* {{i|Cursed Eye}}: The Forgotten's bone toss attack is replaced with multiple rapid melee attacks, the number depending on how long the attack buttons are held. |
||
* {{i|Dark Bum}}: Makes it harder to keep The Forgotten's bone heart containers, since every red hearts on the floor will be collected and transformed into soul hearts, which can only be used by The Soul. |
* {{i|Dark Bum}}: Makes it harder to keep The Forgotten's bone heart containers, since every red hearts on the floor will be collected and transformed into soul hearts, which can only be used by The Soul. |
||
| − | * {{i|Dark Prince's Crown |
+ | * {{i|Dark Prince's Crown}}: The crown activates at one full bone heart. |
* {{i|Dead Cat}}: Sets the Forgotten's bone hearts or the Soul's soul hearts to 1 depending on which form the Forgotten is in when picking the item up. If it's picked up as the Soul, the Forgotten is healed by 1 red heart. |
* {{i|Dead Cat}}: Sets the Forgotten's bone hearts or the Soul's soul hearts to 1 depending on which form the Forgotten is in when picking the item up. If it's picked up as the Soul, the Forgotten is healed by 1 red heart. |
||
| − | * {{i|Dead Eye |
+ | * {{i|Dead Eye}}: Each successful hit with the bone club will increase the damage multiplier. |
| − | * {{i|Deep Pockets |
+ | * {{i|Deep Pockets}}/{{i|Little Baggy}}/{{i|Polydactyly}}/{{i|Starter Deck}}: The swap key must be double tapped to switch active consumables. |
| − | * {{i|Dead Tooth |
+ | * {{i|Dead Tooth}}: The green aura will become active when using melee and charging throw attack. |
| − | * {{i|Dr. Fetus}}: A live bomb will spawn on top of The Forgotten when he starts charging his attack. The Forgotten will toss bombs after releasing the charge, airborne bombs deal 1. |
+ | * {{i|Dr. Fetus}}: A live bomb will spawn on top of The Forgotten when he starts charging his attack. The Forgotten will toss bombs after releasing the charge, airborne bombs deal 1.5× his damage if they collide with an enemy with enough speed. Max distance is obtained with minimal charge. If the bomb explodes while charging, a normal ranged bone attack happens after releasing it. The melee is unaffected. |
* {{i|Epic Fetus}}: The charge attack is replaced by a missile in the Forgotten's hand and a crosshair that may be moved. The missile is thrown at the crosshair when all attack buttons are released, with an additional melee swing in the same direction. Unlike Dr. Fetus, the missile can be held indefinitely without exploding in his hand. The melee attack is unaffected. |
* {{i|Epic Fetus}}: The charge attack is replaced by a missile in the Forgotten's hand and a crosshair that may be moved. The missile is thrown at the crosshair when all attack buttons are released, with an additional melee swing in the same direction. Unlike Dr. Fetus, the missile can be held indefinitely without exploding in his hand. The melee attack is unaffected. |
||
| − | * {{i|Euthanasia |
+ | * {{i|Euthanasia}}: Adds a chance for melee or throw to do triple damage. Attacks will not split into burst bone clubs or be able to kill normally unkillable enemies. |
| − | * {{i|Evil Eye |
+ | * {{i|Evil Eye}}: As the Evil Eye projectile launches, it mimics The Forgotten's melee attack. After launching an Evil Eye projectile as The Forgotten and switching to The Soul, the Evil Eye projectile will continue the melee attack from The Forgotten. After launching an Evil Eye projectile as The Soul and switching to The Forgotten, the Evil Eye projectile will fire bones. |
| − | * {{i|Explosivo |
+ | * {{i|Explosivo}}: No effect on the Forgotten's bone club. |
| + | * {{t|Extension Cord}}: The Forgotten's body is treated as a familiar while controlling The Soul, causing electricity to bounce to it. |
||
| ⚫ | |||
| − | * {{i|Eye of |
+ | * {{i|Eye of Belial}}: No effect on the Forgotten's bone club. |
| ⚫ | |||
| − | * {{i|Fate's Reward |
+ | * {{i|Fate's Reward}}/{{i|Incubus}}: The familiars will fire smaller bone shots even when The Forgotten uses their charged attack. |
| − | * {{i|Fire Mind}}: Melee and throw have a chance to inflict [[burn]]ing. However, neither melee nor throw attacks |
+ | * {{i|Fire Mind}}: Melee and throw have a chance to inflict [[burn]]ing. However, neither melee nor throw attacks trigger the explosive effect. |
| − | * {{i|Flat Stone |
+ | * {{i|Flat Stone}}: The bone bounces on the ground a few times when thrown. |
| − | * {{i|Fruit Cake |
+ | * {{i|Fruit Cake}}: The {{i|Ipecac}} explosion effect may activate on melee attacks. Unlike with actual Ipecac, the explosion will hurt the Forgotten. |
| − | * {{i|Glass Cannon |
+ | * {{i|Glass Cannon}}: Only the active character's health is affected: the Forgotten is set to one empty bone heart and the Soul is set to half a soul heart. |
| − | * {{i|Ghost Pepper |
+ | * {{i|Ghost Pepper}}: Fire is occasionally spawned while attacking or charging. |
* {{i|Godhead}}: Gives the Forgotten's bone homing when thrown, but does not grant an aura. |
* {{i|Godhead}}: Gives the Forgotten's bone homing when thrown, but does not grant an aura. |
||
| − | * {{i|Guppy's Paw}}/{{i|Potato Peeler |
+ | * {{i|Guppy's Paw}}/{{i|Potato Peeler}}: The Forgotten cannot use either of these items, as neither bone hearts or soul/black hearts qualify for them. |
| − | * {{i|Haemolacria |
+ | * {{i|Haemolacria}}: A burst of blood shots appears whenever an enemy is hit with the melee attack. The throw is unaffected. Size and reach of the melee attack are increased. |
| − | * {{i|Head of the Keeper |
+ | * {{i|Head of the Keeper}}: Head of the Keeper will not work with either the melee attack or throw. |
| − | * {{i|Holy Light |
+ | * {{i|Holy Light}}: The melee and ranged attack can create beams of light. |
* [[Homing tears]]: The thrown bone homes in on enemies. |
* [[Homing tears]]: The thrown bone homes in on enemies. |
||
* {{i|Ipecac}}: The Forgotten's melee attack will trigger an explosion when it makes contact with an enemy, but The Forgotten will not be harmed by it. This does not make The Forgotten impervious to other types of explosions unless it is a deadly explosion caused by the melee hit. |
* {{i|Ipecac}}: The Forgotten's melee attack will trigger an explosion when it makes contact with an enemy, but The Forgotten will not be harmed by it. This does not make The Forgotten impervious to other types of explosions unless it is a deadly explosion caused by the melee hit. |
||
** Ipecac + {{i|Pyromaniac}}: The Forgotten will be healed by the explosion whenever they hit an enemy. |
** Ipecac + {{i|Pyromaniac}}: The Forgotten will be healed by the explosion whenever they hit an enemy. |
||
* {{i|IV Bag}}/[[Blood Donation Machine]]s: Will empty bone hearts without destroying them while in skeletal form. |
* {{i|IV Bag}}/[[Blood Donation Machine]]s: Will empty bone hearts without destroying them while in skeletal form. |
||
| − | * {{i|Jacob's Ladder |
+ | * {{i|Jacob's Ladder}}: Both the melee and thrown attacks cause 1-2 arcs of electricity to zap out when they hit an enemy. |
| − | * {{i|Kidney Stone |
+ | * {{i|Kidney Stone}}: The Forgotten launches a quick series of melee attacks after firing the kidney stone. |
| − | * {{i|Lachryphagy |
+ | * {{i|Lachryphagy}}: No effect on the Forgotten's bone club. |
| − | * {{i|Lead Pencil |
+ | * {{i|Lead Pencil}}: No effect on the Forgotten's bone club. |
| + | * {{i|Libra}}: Barring combinations with other items, the Forgotten's heavy attack rate penalty is mitigated but all other stats consequently become lower. The Soul is less affected, gaining a small all stats up from the speed bonus. |
||
| − | * {{i|Little Horn |
+ | * {{i|Little Horn}}: The club arcs occasionally turn black, but they do not instantly kill enemies. |
* {{i|Loki's Horns}}: The Forgotten holds four bones, one in each cardinal direction. There is a chance for the melee or throw attacks to be triggered in all cardinal directions. |
* {{i|Loki's Horns}}: The Forgotten holds four bones, one in each cardinal direction. There is a chance for the melee or throw attacks to be triggered in all cardinal directions. |
||
| − | * {{i|Lost Contact |
+ | * {{i|Lost Contact}}: The melee attack can deflect enemy shots. Deflected shots may hit enemies for fairly small damage depending on the enemy shot's size. |
* {{i|The Ludovico Technique}}: The large tear will follow the Forgotten. It can be hit with the melee attack to propel it, which also increases its damage. |
* {{i|The Ludovico Technique}}: The large tear will follow the Forgotten. It can be hit with the melee attack to propel it, which also increases its damage. |
||
| − | ** The Ludovico Technique + {{i|Multidimensional Baby |
+ | ** The Ludovico Technique + {{i|Multidimensional Baby}}: Creates a second large tear when the first tear touches Multidimensional Baby. |
* {{i|A Lump of Coal}}: The melee attack is unaffected regardless of range. The bone toss attack does extra damage from further away. |
* {{i|A Lump of Coal}}: The melee attack is unaffected regardless of range. The bone toss attack does extra damage from further away. |
||
| − | * {{i|Marked |
+ | * {{i|Marked}}: The Forgotten will get stat upgrades but is otherwise unaffected. |
* {{i|Mom's Eye}}: The Forgotten holds two bones, one behind and one in front. There is a chance for the melee or throw attacks to be triggered in both directions. |
* {{i|Mom's Eye}}: The Forgotten holds two bones, one behind and one in front. There is a chance for the melee or throw attacks to be triggered in both directions. |
||
* {{i|Mom's Knife}}: The knife will attach to The Forgotten's bone club, forming a scythe. Increases the size of both the melee swing and the bone throw, and allows a single melee swing to deal damage to an enemy twice instead of just once. +4 damage. |
* {{i|Mom's Knife}}: The knife will attach to The Forgotten's bone club, forming a scythe. Increases the size of both the melee swing and the bone throw, and allows a single melee swing to deal damage to an enemy twice instead of just once. +4 damage. |
||
| − | * {{i|Monstro's Lung |
+ | * {{i|Monstro's Lung}}: The Forgotten's bone toss attack is replaced by a typical Monstro's Lung shot, though the tears are all bones. |
* {{i|My Reflection}}: The Forgotten will get stat upgrades but is otherwise unaffected. |
* {{i|My Reflection}}: The Forgotten will get stat upgrades but is otherwise unaffected. |
||
* {{i|Mysterious Liquid}}: Throwing the bone creates a trail of damaging green creep. |
* {{i|Mysterious Liquid}}: Throwing the bone creates a trail of damaging green creep. |
||
| − | * {{i|The Parasite}}: Smaller bone shots and normal split tears appear whenever an enemy is hit with the melee attack. The throw |
+ | * {{i|The Parasite}}: Smaller bone shots and normal split tears appear whenever an enemy is hit with the melee attack. The bone throw will cause smaller bone shots to appear when it hits an enemy. |
| − | * {{i|Parasitoid |
+ | * {{i|Parasitoid}}: No effect on the Forgotten's bone club. |
* {{i|Polyphemus}}: The bone club becomes a lot larger, causing hits to cover a larger area. |
* {{i|Polyphemus}}: The bone club becomes a lot larger, causing hits to cover a larger area. |
||
| − | * {{i|Pop! |
+ | * {{i|Pop!}}: No effect on the Forgotten's bone club. |
| − | * {{i|Proptosis |
+ | * {{i|Proptosis}}: Damage is doubled for melee, while damage reduces normally with range when thrown. |
| − | * {{i|Pupula Duplex |
+ | * {{i|Pupula Duplex}}: No effect on the Forgotten's bone club. |
* {{i|Rubber Cement}}: No effect on the Forgotten's bone club. |
* {{i|Rubber Cement}}: No effect on the Forgotten's bone club. |
||
| − | * {{i|Schoolbag| |
+ | * {{i|Schoolbag}}/{{i|Starter Deck}}/{{i|Little Baggy}}/{{i|Polydactyly}}/{{i|Deep Pockets}}: The swap key must be double tapped to switch active items/consumables. |
| − | * {{i|Sinus Infection |
+ | * {{i|Sinus Infection}}: No effect on the Forgotten's bone club. |
* {{i|Soy Milk}}: The bone's melee attack is extremely fast and the charge for throwing is short. |
* {{i|Soy Milk}}: The bone's melee attack is extremely fast and the charge for throwing is short. |
||
| − | * {{i|Sprinkler |
+ | * {{i|Sprinkler}}: Sprinkler fires bone tears that do The Forgotten's tear damage without the multiplier. |
* {{i|Strange Attractor}}: Melee will attract pickups and throw will attract enemies to the bone club making them easier to kill. |
* {{i|Strange Attractor}}: Melee will attract pickups and throw will attract enemies to the bone club making them easier to kill. |
||
| − | * {{i|Sulfuric Acid |
+ | * {{i|Sulfuric Acid}}: Increases damage. Melee swings and throws occasionally turn yellow but no other effect. |
* {{i|Technology}}: A laser ring will appear around The Forgotten whenever he swings, and a laser is fired between The Forgotten and the bone club whenever it is thrown. |
* {{i|Technology}}: A laser ring will appear around The Forgotten whenever he swings, and a laser is fired between The Forgotten and the bone club whenever it is thrown. |
||
| − | ** Technology + {{i|Proptosis |
+ | ** Technology + {{i|Proptosis}}: Size of the laser ring is doubled. |
| − | * {{i|Tech X |
+ | * {{i|Tech X}}: A laser ring appears around the bone club whenever it is thrown. |
** Tech X + {{i|Brimstone}}: The laser ring appears around the brimstone ball instead. |
** Tech X + {{i|Brimstone}}: The laser ring appears around the brimstone ball instead. |
||
** Tech X + {{i|Dr. Fetus}}: The laser ring appears around the thrown bomb instead. |
** Tech X + {{i|Dr. Fetus}}: The laser ring appears around the thrown bomb instead. |
||
* {{i|Tech.5}}: Lasers occasionally fire when using melee or charging throw. |
* {{i|Tech.5}}: Lasers occasionally fire when using melee or charging throw. |
||
| − | * {{i|Technology Zero |
+ | * {{i|Technology Zero}}: No effect on the Forgotten's bone club. |
* {{i|Tiny Planet}}: The bone throw now spins around in a circle and can be thrown further than normal with range upgrades. |
* {{i|Tiny Planet}}: The bone throw now spins around in a circle and can be thrown further than normal with range upgrades. |
||
| − | * {{i|Trisagion |
+ | * {{i|Trisagion}}: No effect on the Forgotten's bone club. |
| − | * {{i|Varicose Veins |
+ | * {{i|Varicose Veins}}: Fires ten bone tears in all directions that deal high damage. |
| − | * {{i|The Wiz |
+ | * {{i|The Wiz}}: The Forgotten wields two clubs, one in each hand, pointing diagonally outwards. |
== Unlockable items == |
== Unlockable items == |
||
| − | {{ |
+ | {{achievement|Divorce Papers |text}} |
| − | {{ |
+ | {{achievement|Marrow |text}} |
| − | {{ |
+ | {{achievement|Pointy Rib |text}} |
| − | {{ |
+ | {{achievement|Slipped Rib |text}} |
| − | {{ |
+ | {{achievement|Brittle Bones |text}} |
| − | {{ |
+ | {{achievement|Jaw Bone |text}} |
| − | {{ |
+ | {{achievement|Finger Bone |text}} |
| − | {{ |
+ | {{achievement|Dad's Ring |text}} |
| − | {{ |
+ | {{achievement|Hallowed Ground |text}} |
| − | {{ |
+ | {{achievement|Book of the Dead|text}} |
| − | {{ |
+ | {{achievement|Bound Baby |text}} |
| − | {{ |
+ | {{achievement|Bone Baby |text}} |
| + | |||
| ⚫ | |||
| ⚫ | |||
| ⚫ | |||
| ⚫ | |||
== Gallery == |
== Gallery == |
||
<gallery> |
<gallery> |
||
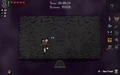
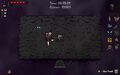
| − | Start Forgotten.PNG | The spawn floor when playing The Forgotten. |
+ | Start Forgotten.PNG | The spawn floor when playing The Forgotten. |
| − | DarkRoomTreasure closed.jpg | The dirt mound, as found in the [[Dark Room]]. |
+ | DarkRoomTreasure closed.jpg | The dirt mound, as found in the [[Dark Room]]. |
| − | DarkRoomTreasure opened.jpg | The dirt mound, now opened with [[Mom's Shovel]]. |
+ | DarkRoomTreasure opened.jpg | The dirt mound, now opened with [[Mom's Shovel]]. |
| − | + | AfterbirthPlus Booster Pack 5 Concepts.jpg | Concept art for the Forgotten in the top right corner, along with Booster pack items, including Booster Pack 5 items and trinkets that are unlocked as a result of defeating final bosses as the Forgotten. |
|
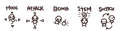
| − | Forgotten Items Concept.png | Concept art for The Forgotten's item synergies, by _Kilburn. |
+ | Forgotten Items Concept.png | Concept art for The Forgotten's item synergies, by _Kilburn. |
| − | TheForgottenMomsKnifeComparison.png | A comparison between [[The Forgotten]]'s bone attack with and without Mom's Knife. |
+ | TheForgottenMomsKnifeComparison.png | A comparison between [[The Forgotten]]'s bone attack with and without Mom's Knife. |
</gallery> |
</gallery> |
||
| ⚫ | |||
| ⚫ | |||
| ⚫ | |||
| ⚫ | |||
{{nav|booster pack|character}} |
{{nav|booster pack|character}} |
||
[[category:Booster Pack 5]] |
[[category:Booster Pack 5]] |
||
Revision as of 05:21, 27 November 2020
 | |
| None | None | |
| None | None |
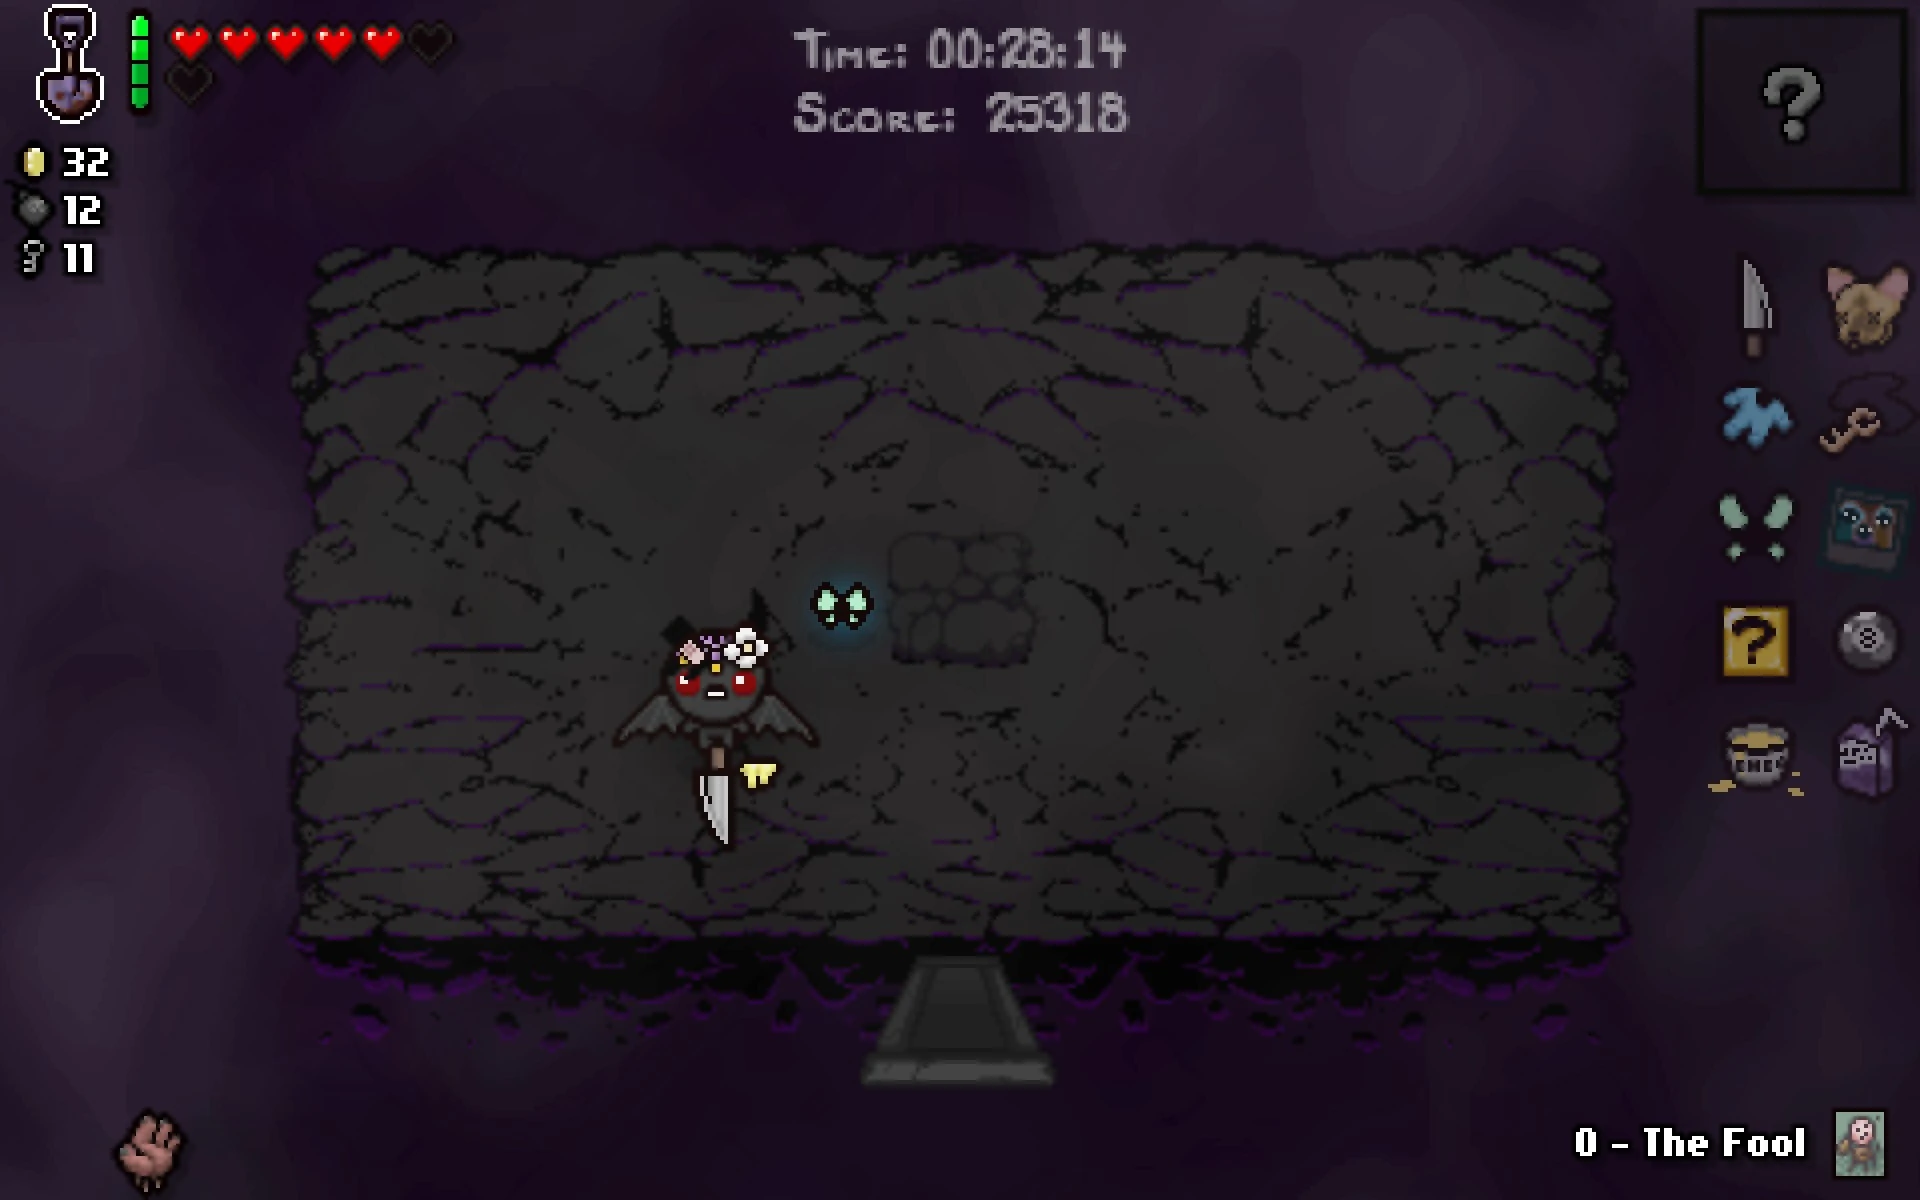
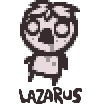
The Forgotten is a secret character added in Booster Pack #5 that resembles a Bony. He cannot fire regular tears, and instead has a bone club that can be swung as a melee weapon or charged to be thrown.
The Forgotten cannot acquire regular heart containers. Any regular heart containers acquired will be turned into bone hearts, and any soul or black hearts will be given to The Soul. The Forgotten and The Soul share a health bar, so each form has a maximum of 6 hearts instead of the regular 12.
The Soul
Pressing the swap key (CTRL on PC / R2 on PS4 / RT on Xbox / ZR on Switch) will switch control to The Soul, a blue ghost chained to the Forgotten who fires spectral tears and flies.
While controlling The Soul, The Forgotten cannot take damage, blocks all normal shots that touch it, and attracts shots in a small <1 tile radius. If the Soul dies, the run will end.
Notes
- The Forgotten's bone club deals 3× his damage when swung and 1.5× his damage when thrown.
- The Forgotten's bone club passes through walls, obstacles, and enemies.
- The Forgotten cannot take deals with the Devil as he only has bone hearts, but The Soul can with its soul hearts. If a deal would kill The Soul, quickly switching to The Forgotten will keep him alive.
- If The Soul has no Hearts, switching to the Soul is disabled until another Soul or Black Heart is acquired.
- Losing red hearts inside bone heart containers does not count as red heart damage for devil deal chances, but breaking bone heart containers does.
- The Forgotten's melee attack can collect pickups and open chests.
- Opening a Mimic Chest this way deals no damage.
- Bomb Chests cannot be opened this way. Locked Chests and Eternal Chests still require a key or the
 Paper Clip to open.
 - Items that can be moved but cannot be picked up are pushed. This can launch bombs Dr. Fetus-style or knock Troll Bombs away.
- Crow Heart prevents The Forgotten from losing bone heart containers as long as it still has red health.
- The shot speed and tear height stats have no effect on the Forgotten's melee attack or bone toss.
- The range stat increases how far away from the Forgotten the melee attack's arcs appear. It doesn't affect the bone toss.
- Items that increase character size increase the range of the melee attack. Items that decrease character size have no effect on the range of the melee attack.
- To switch between two pills/cards, press the swap key twice quickly.
- Picking up health upgrades as The Soul will convert them into soul hearts, just like ???. It's generally advisable to pick up health as The Forgotten, since bone hearts are much rarer.
- Unidentified pills are more safely consumed in Soul form, as a Hematemesis pill can be very detrimental for the Forgotten but has no negative effect when consumed as the Soul.
- Health Down pills are converted to Health Up for both forms, but the empty bone heart gained may be risky for retaining Devil Room chances.
Unlocking the Forgotten
The Lamb must have been defeated previously before The Forgotten can be unlocked, and unlocking The Forgotten can be done in both Normal and Hard difficulty. Having The Negative unlocked is recommended.
- First, start a new unseeded run as any character. Defeat the first floor's boss within 1 minute. If done correctly, Mom will yell and the sound of running footsteps will play, then a large shadow of a shovel handle will loom over the floor of the starting room. Bombing anywhere in the starting room will spawn the Broken Shovel. Initially the shovel piece behaves like a pickup, laying on the floor, and turns into an active collectible only when touched for the first time.
- Holding the Broken Shovel will cause Mom to continually try to stomp Isaac. Using the Broken Shovel will stop the stomping for the current room, or the current wave of a multi-wave room such as the Boss Rush.
- The stomps won't happen in the Mom fight.
- Stomps count as explosions, soPyromaniac orHost Hat provide immunity to them.
- Stomps break rocks and damage enemies. If the player has Gnawed Leaf and a lot of patience, the stomps will eventually clear rooms.
- On XL floors, only the last boss must be defeated. The Emperor Card allows the first boss to be skipped.
- Once the Broken Shovel is picked up, it must not be replaced by another active item. If it is on an item pedestal when Isaac leaves the room, it will disappear.
- Holding the Broken Shovel will cause Mom to continually try to stomp Isaac. Using the Broken Shovel will stop the stomping for the current room, or the current wave of a multi-wave room such as the Boss Rush.
- Next, clear Boss Rush. This will grant the second piece of the Broken Shovel, completing Mom's Shovel.
- The Broken Shovel must be held when the boss rush is beaten. Otherwise, only a normal boss rush completion item will drop.
- After defeating Mom, if it is unlocked onlyThe Negative will spawn, otherwise a standard boss item will spawn.
- If The Negative is not unlocked you must use a Sacrifice Room to proceed to Dark Room, you are not guaranteed to be able to do this on every run.
- The normal 20-minute time limit to reach Boss Rush does not apply. The hole to Error: The given stage ("The Womb") does not exist. after Mom will be sealed until the Boss Rush is completed.
- After Mom's Shovel is acquired, Mom's feet will stop attempting to stomp Isaac.
- Finally, a single Grave Room with a dirt patch in its center will appear in the Dark Room. Using Mom's Shovel while standing on the dirt patch unlocks The Forgotten.
- If the Grave Room is exited before the soul reaches the top of the screen, the Forgotten may not unlock.
- Holding Mom's Shovel prevents the beam of light to the Cathedral from appearing, forcing Isaac into the trapdoor to Sheol.
- If stuck, confused, or frustrated, check theBroken Shovel page for tips and help.
Item Interactions
Many items have unique interactions with The Forgotten's bone club or the Soul and the Forgotten's unique health system. The Soul's tears are affected normally.
- Abaddon: Grants 6 black hearts to The Soul and empties The Forgotten's bone hearts, but doesn't remove them.
- Adrenaline: Empty bone hearts increase damage, but the damage buff is removed if the bone heart breaks.
- Angelic Prism: When the bone club hits the prism, the prism fires 4 bone clubs while the original bone club travels back to The Forgotten. The bone club will quadruple when passing through prism whether traveling away from or back towards The Forgotten. However, bone clubs fired from the prism will travel and spread out very quickly, making it hard to hit enemies with them unless they are close to the prism.
- Anti-Gravity: The bone's melee attack will linger in place briefly and can damage enemies, or even pick up items that move into the arc. Will not damage enemies more than once per swing. The throw is unaffected.
- Anti-Gravity + Mom's Knife: As Mom's Knife allows hitting enemies more than once in a single swing, with Anti-Gravity it will hit enemies up to 4 times. The throw is unaffected.
- Blood Clot: The Forgotten has a 50% chance for Blood Clot effects to apply to melee or ranged attack. When Blood Clot effects are applied the bone will turn red.
- Brimstone: The charged attack will spawn a Brimstone ball which will float in front of The Forgotten for a few seconds before disappearing. The Forgotten will still melee attack while performing this action.
- Chocolate Milk: The bone grows in size and damage as it is charged, but it cannot be thrown. Unlike regular tears, the bone swing cannot be spammed by rapidly tapping the attack button.
- Compound Fracture/Cricket's Body: Smaller bone shots appear whenever an enemy is hit with the melee attack. The throw is unaffected.
- Converter: Takes two soul or black hearts and gives a bone heart if used in Soul form. If the Soul runs out of hearts this way, it will not cause death but instead just automatically swap back to the Forgotten.
- Cursed Eye: The Forgotten's bone toss attack is replaced with multiple rapid melee attacks, the number depending on how long the attack buttons are held.
- Dark Bum: Makes it harder to keep The Forgotten's bone heart containers, since every red hearts on the floor will be collected and transformed into soul hearts, which can only be used by The Soul.
- Dark Prince's Crown: The crown activates at one full bone heart.
- Dead Cat: Sets the Forgotten's bone hearts or the Soul's soul hearts to 1 depending on which form the Forgotten is in when picking the item up. If it's picked up as the Soul, the Forgotten is healed by 1 red heart.
- Dead Eye: Each successful hit with the bone club will increase the damage multiplier.
- Deep Pockets/Little Baggy/Polydactyly/Starter Deck: The swap key must be double tapped to switch active consumables.
- Dead Tooth: The green aura will become active when using melee and charging throw attack.
- Dr. Fetus: A live bomb will spawn on top of The Forgotten when he starts charging his attack. The Forgotten will toss bombs after releasing the charge, airborne bombs deal 1.5× his damage if they collide with an enemy with enough speed. Max distance is obtained with minimal charge. If the bomb explodes while charging, a normal ranged bone attack happens after releasing it. The melee is unaffected.
- Epic Fetus: The charge attack is replaced by a missile in the Forgotten's hand and a crosshair that may be moved. The missile is thrown at the crosshair when all attack buttons are released, with an additional melee swing in the same direction. Unlike Dr. Fetus, the missile can be held indefinitely without exploding in his hand. The melee attack is unaffected.
- Euthanasia: Adds a chance for melee or throw to do triple damage. Attacks will not split into burst bone clubs or be able to kill normally unkillable enemies.
- Evil Eye: As the Evil Eye projectile launches, it mimics The Forgotten's melee attack. After launching an Evil Eye projectile as The Forgotten and switching to The Soul, the Evil Eye projectile will continue the melee attack from The Forgotten. After launching an Evil Eye projectile as The Soul and switching to The Forgotten, the Evil Eye projectile will fire bones.
- Explosivo: No effect on the Forgotten's bone club.
- Extension Cord: The Forgotten's body is treated as a familiar while controlling The Soul, causing electricity to bounce to it.
- Eye of Belial: No effect on the Forgotten's bone club.
- Eye of Greed: No effect on the Forgotten's bone club.
- Fate's Reward/Incubus: The familiars will fire smaller bone shots even when The Forgotten uses their charged attack.
- Fire Mind: Melee and throw have a chance to inflict burning. However, neither melee nor throw attacks trigger the explosive effect.
- Flat Stone: The bone bounces on the ground a few times when thrown.
- Fruit Cake: The Ipecac explosion effect may activate on melee attacks. Unlike with actual Ipecac, the explosion will hurt the Forgotten.
- Glass Cannon: Only the active character's health is affected: the Forgotten is set to one empty bone heart and the Soul is set to half a soul heart.
- Ghost Pepper: Fire is occasionally spawned while attacking or charging.
- Godhead: Gives the Forgotten's bone homing when thrown, but does not grant an aura.
- Guppy's Paw/Potato Peeler: The Forgotten cannot use either of these items, as neither bone hearts or soul/black hearts qualify for them.
- Haemolacria: A burst of blood shots appears whenever an enemy is hit with the melee attack. The throw is unaffected. Size and reach of the melee attack are increased.
- Head of the Keeper: Head of the Keeper will not work with either the melee attack or throw.
- Holy Light: The melee and ranged attack can create beams of light.
- Homing tears: The thrown bone homes in on enemies.
- Ipecac: The Forgotten's melee attack will trigger an explosion when it makes contact with an enemy, but The Forgotten will not be harmed by it. This does not make The Forgotten impervious to other types of explosions unless it is a deadly explosion caused by the melee hit.
- Ipecac + Pyromaniac: The Forgotten will be healed by the explosion whenever they hit an enemy.
- Ipecac +
- IV Bag/Blood Donation Machines: Will empty bone hearts without destroying them while in skeletal form.
- Jacob's Ladder: Both the melee and thrown attacks cause 1-2 arcs of electricity to zap out when they hit an enemy.
- Kidney Stone: The Forgotten launches a quick series of melee attacks after firing the kidney stone.
- Lachryphagy: No effect on the Forgotten's bone club.
- Lead Pencil: No effect on the Forgotten's bone club.
- Libra: Barring combinations with other items, the Forgotten's heavy attack rate penalty is mitigated but all other stats consequently become lower. The Soul is less affected, gaining a small all stats up from the speed bonus.
- Little Horn: The club arcs occasionally turn black, but they do not instantly kill enemies.
- Loki's Horns: The Forgotten holds four bones, one in each cardinal direction. There is a chance for the melee or throw attacks to be triggered in all cardinal directions.
- Lost Contact: The melee attack can deflect enemy shots. Deflected shots may hit enemies for fairly small damage depending on the enemy shot's size.
- The Ludovico Technique: The large tear will follow the Forgotten. It can be hit with the melee attack to propel it, which also increases its damage.
- The Ludovico Technique + Multidimensional Baby: Creates a second large tear when the first tear touches Multidimensional Baby.
- The Ludovico Technique +
- A Lump of Coal: The melee attack is unaffected regardless of range. The bone toss attack does extra damage from further away.
- Marked: The Forgotten will get stat upgrades but is otherwise unaffected.
- Mom's Eye: The Forgotten holds two bones, one behind and one in front. There is a chance for the melee or throw attacks to be triggered in both directions.
- Mom's Knife: The knife will attach to The Forgotten's bone club, forming a scythe. Increases the size of both the melee swing and the bone throw, and allows a single melee swing to deal damage to an enemy twice instead of just once. +4 damage.
- Monstro's Lung: The Forgotten's bone toss attack is replaced by a typical Monstro's Lung shot, though the tears are all bones.
- My Reflection: The Forgotten will get stat upgrades but is otherwise unaffected.
- Mysterious Liquid: Throwing the bone creates a trail of damaging green creep.
- The Parasite: Smaller bone shots and normal split tears appear whenever an enemy is hit with the melee attack. The bone throw will cause smaller bone shots to appear when it hits an enemy.
- Parasitoid: No effect on the Forgotten's bone club.
- Polyphemus: The bone club becomes a lot larger, causing hits to cover a larger area.
- Pop!: No effect on the Forgotten's bone club.
- Proptosis: Damage is doubled for melee, while damage reduces normally with range when thrown.
- Pupula Duplex: No effect on the Forgotten's bone club.
- Rubber Cement: No effect on the Forgotten's bone club.
- Schoolbag/Starter Deck/Little Baggy/Polydactyly/Deep Pockets: The swap key must be double tapped to switch active items/consumables.
- Sinus Infection: No effect on the Forgotten's bone club.
- Soy Milk: The bone's melee attack is extremely fast and the charge for throwing is short.
- Sprinkler: Sprinkler fires bone tears that do The Forgotten's tear damage without the multiplier.
- Strange Attractor: Melee will attract pickups and throw will attract enemies to the bone club making them easier to kill.
- Sulfuric Acid: Increases damage. Melee swings and throws occasionally turn yellow but no other effect.
- Technology: A laser ring will appear around The Forgotten whenever he swings, and a laser is fired between The Forgotten and the bone club whenever it is thrown.
- Technology + Proptosis: Size of the laser ring is doubled.
- Technology +
- Tech X: A laser ring appears around the bone club whenever it is thrown.
- Tech.5: Lasers occasionally fire when using melee or charging throw.
- Technology Zero: No effect on the Forgotten's bone club.
- Tiny Planet: The bone throw now spins around in a circle and can be thrown further than normal with range upgrades.
- Trisagion: No effect on the Forgotten's bone club.
- Varicose Veins: Fires ten bone tears in all directions that deal high damage.
- The Wiz: The Forgotten wields two clubs, one in each hand, pointing diagonally outwards.
Unlockable items
Trivia
- The Forgotten's starting health is listed as "-1" on the character selection screen.
- The Forgotten is Isaac's withered body.
- The Forgotten's concept is confirmed to have originally been an old concept for a direct sequel to The Binding of Isaac: Rebirth.
Gallery
The spawn floor when playing The Forgotten.
The dirt mound, as found in the Dark Room.
The dirt mound, now opened with Mom's Shovel.
Concept art for the Forgotten in the top right corner, along with Booster pack items, including Booster Pack 5 items and trinkets that are unlocked as a result of defeating final bosses as the Forgotten.
Concept art for The Forgotten's item synergies, by _Kilburn.
A comparison between The Forgotten's bone attack with and without Mom's Knife.

|


_App.png)